
Valheim is leaving Early Access on September 9, 2026, with a full launch on PlayStation 5 and Nintendo Switch 2 alongside cross-play — which makes now a great time to set up a persistent home server for your Viking crew. This guide walks through hosting your own Valheim dedicated server using Docker, the same approach we used for our Minecraft setup guide.
What You’ll Need
- A dedicated machine (a mini PC, an old desktop, or similar — see our guide to picking hardware if you haven’t settled on one yet)
- At least 2-4GB RAM — 2GB is fine for a small, fresh world with 2-3 players; 4GB becomes necessary as the world grows and more players join
- Docker installed on your machine
- x86_64 hardware. Unlike Minecraft, Valheim’s dedicated server does not run on ARM (like a Raspberry Pi) — even with emulation, performance isn’t acceptable. Make sure your hardware is standard x86_64.
Step 1: Install Docker
If you don’t already have Docker installed, grab Docker Desktop (Windows/Mac) or Docker Engine (Linux) the same way as our other setup guides. Verify it’s working with:
docker --version
Step 2: Run the Valheim Server Container
The community-maintained lloesche/valheim-server image is the standard choice for Dockerized Valheim hosting — it handles SteamCMD installation, automatic updates, and scheduled world backups out of the box.
docker run -d \
  --name valheim-server \
  --cap-add=sys_nice \
  -p 2456-2457:2456-2457/udp \
  -v $HOME/valheim-server/config:/config \
  -v $HOME/valheim-server/data:/opt/valheim \
  -e SERVER_NAME="My Valheim Server" \
  -e WORLD_NAME="Midgard" \
  -e SERVER_PASS="changeme123" \
  -e SERVER_PUBLIC="false" \
  lloesche/valheim-server
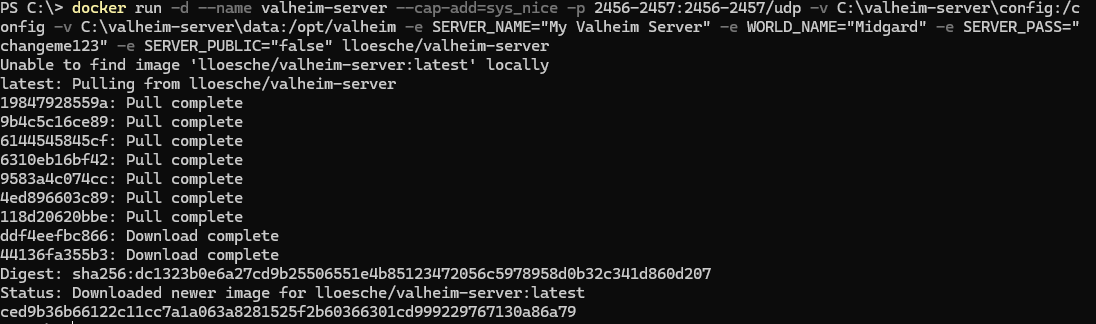
What this does:
--cap-add=sys_nice— grants a permission the server process needs to manage its own priority-p 2456-2457:2456-2457/udp— opens Valheim’s default UDP ports-v .../configand-v .../data— persists your world data and server config outside the containerSERVER_NAME— what shows up in the server browserWORLD_NAME— the name of your save fileSERVER_PASS— must be at least 5 characters and can’t be part of the server nameSERVER_PUBLIC="false"— keeps your server private, not listed in the public server browser (set to"true"if you want it publicly discoverable)
Replace the placeholder values (server name, world name, password) with your own before running the command.
Step 3: Confirm It’s Running
Check the logs to watch the server download and start up:
docker logs -f valheim-server

Once you see logs referencing Opened Steam server and Loading: Done, your server is live and ready for connections.
On first run, the container downloads the Valheim dedicated server files (roughly 1GB), so this can take a few minutes depending on your connection.
Step 4: Port Forward for Outside Access
Same process as our other guides:
- Log into your router’s admin panel
- Find Port Forwarding
- Forward UDP ports 2456-2457 to your server machine’s local IP address
- Set a static local IP for your server machine so the forwarding rule doesn’t break if your router reassigns addresses

Friends can then connect using your public IP address plus the server name/password you set.
Confirm Friends Can Connect
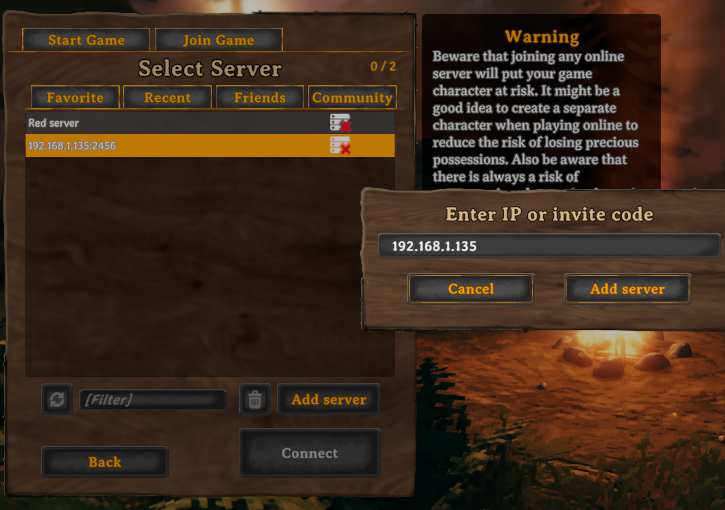
Once port forwarding is set up, test the connection yourself. Open Valheim, go to Join Game, click Add Server, and enter your server’s IP address.
Automatic Updates and Backups
One of the best parts of this image: it handles ongoing maintenance for you.
- Automatic updates: the container checks Steam periodically for new Valheim versions and updates automatically, restarting the server when a new version is found
- Automatic backups: world backups are created on a schedule (hourly by default) and old backups are cleaned up automatically, so you’re protected against corruption without manual work
Both of these behaviors are configurable through additional environment variables if you want more or less frequent updates/backups.
Common First-Time Issues
- Friends can’t connect: same as Minecraft — check port forwarding and your OS firewall first. Also confirm you shared UDP ports, not TCP.
- Server won’t start: check
docker logs -f valheim-server— a password under 5 characters or one that matches part of the server name are common early mistakes that show clearly in the logs. - World not saving: verify your
-vvolume paths are correctly mapped to real folders on your host machine.
Getting Started
If you haven’t picked out hardware yet, our mini PC hosting guide covers what to look for. And if you’re weighing self-hosting against other options like paid hosting, check our full comparison of every method to play with friends.
Pingback: Best and Most Popular Valheim Docker Images – The Homelab Gamer
Pingback: Port Forwarding for Game Servers: A No-BS Guide – The Homelab Gamer