
Running your own Minecraft server at home gives you full control — no monthly hosting fees, no third-party rules, and better performance than you’d expect from a cheap VPS. This guide walks through the entire process using Docker, the same reliable method used for hosting dedicated servers for games like Factorio, Valheim, and ARK.
You don’t need to be a sysadmin to follow this. If you can install software and edit a text file, you can do this.
What You’ll Need
- A dedicated machine (a mini PC, an old desktop, or even a Raspberry Pi 4/5 for small groups)
- At least 4GB RAM (8GB+ recommended if you’re using mods or hosting 5+ players)
- A stable internet connection with the ability to port forward
- Docker installed on your machine (Windows, Linux, or macOS all work)
A budget mini PC (Intel N95 or similar, 16GB RAM) is more than capable of running a smooth vanilla or lightly-modded Minecraft server for a handful of friends.
Step 1: Install Docker
If you don’t already have Docker installed:
- Windows/Mac: Download and install Docker Desktop
- Linux: Install Docker Engine via your package manager (e.g.
apt install docker.ioon Ubuntu)
Verify it’s working by running:
docker --version

Step 2: Pull the Minecraft Server Image
The community-maintained itzg/minecraft-server image is the standard choice — it’s actively maintained, supports every major Minecraft version, and handles most of the tedious config for you.
Run this command to start a basic vanilla server:
docker run -d -it \
  -p 25565:25565 \
  -e EULA=TRUE \
  -v /path/to/data:/data \
  --name mc-server \
  itzg/minecraft-server
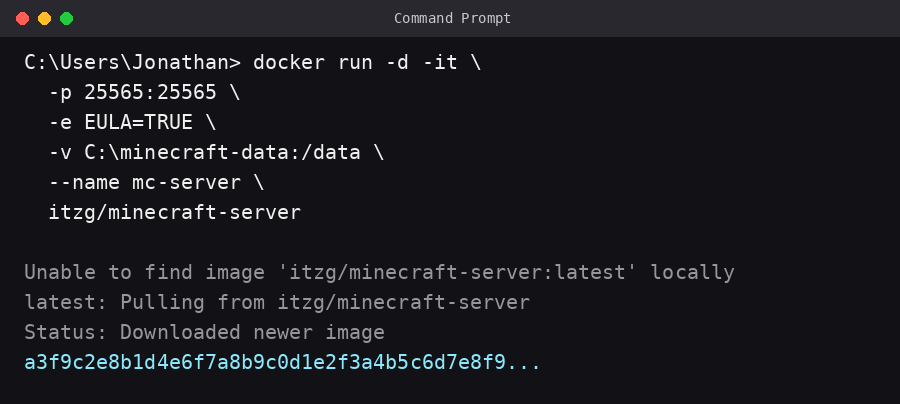
What this does:
-p 25565:25565— opens the default Minecraft port-e EULA=TRUE— accepts Mojang’s EULA (required to run the server)-v /path/to/data:/data— stores your world data outside the container, so it survives restarts/updates--name mc-server— names the container so it’s easy to manage later
Replace /path/to/data with a real folder on your machine, e.g. /home/user/minecraft-data or C:\minecraft-data.
Step 3: Confirm It’s Running
Check the logs to make sure the server started correctly:
docker logs -f mc-server
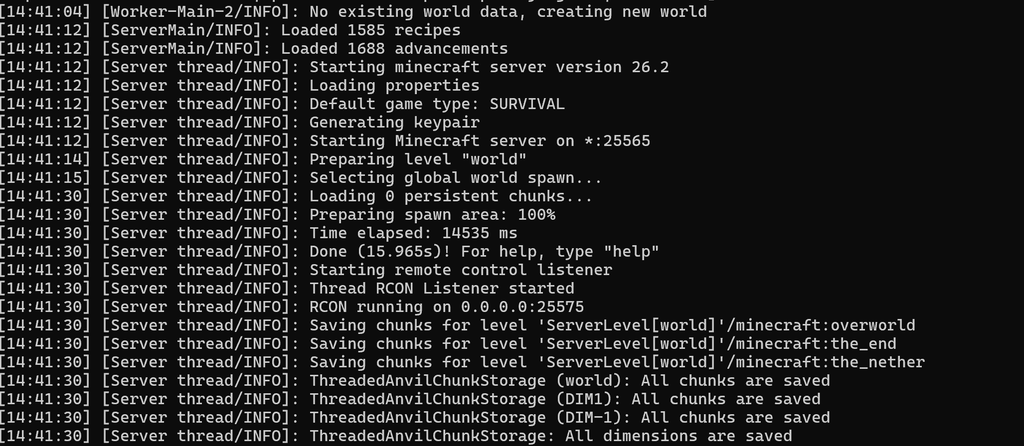
You should see it generate the world, and eventually print a line like [Server thread/INFO]: Done (15.965s)! For help, type "help". Once you see that, the server is live on your local network.
Step 4: Port Forward for Outside Access
If you only want to play with people on your home network, you can skip this step. To let friends connect from outside:
- Log into your router’s admin panel (usually
192.168.1.1or similar) - Find the Port Forwarding section
- Forward TCP port 25565 to your server machine’s local IP address
- Give your server machine a static local IP (either through your router’s DHCP settings or a manual OS network config) so the forwarding rule doesn’t break when it reconnects
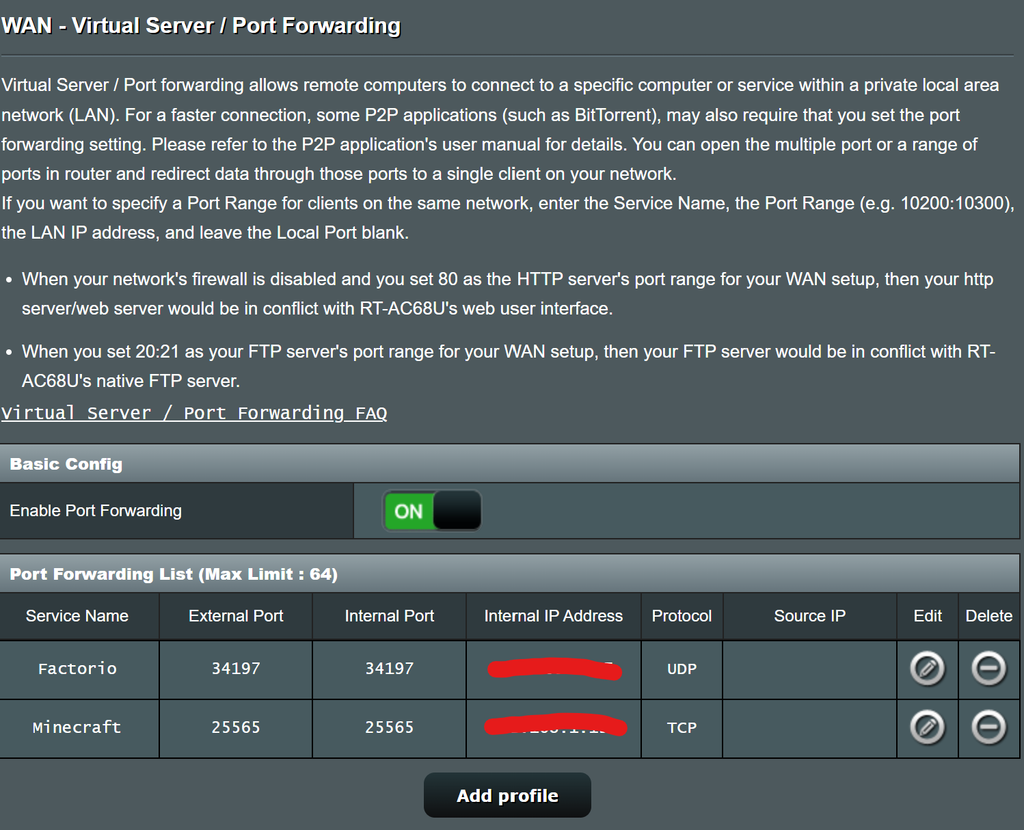
Your friends can then connect using your public IP address, which you can find by searching “what’s my IP” from the server machine.
Confirm Friends Can Connect
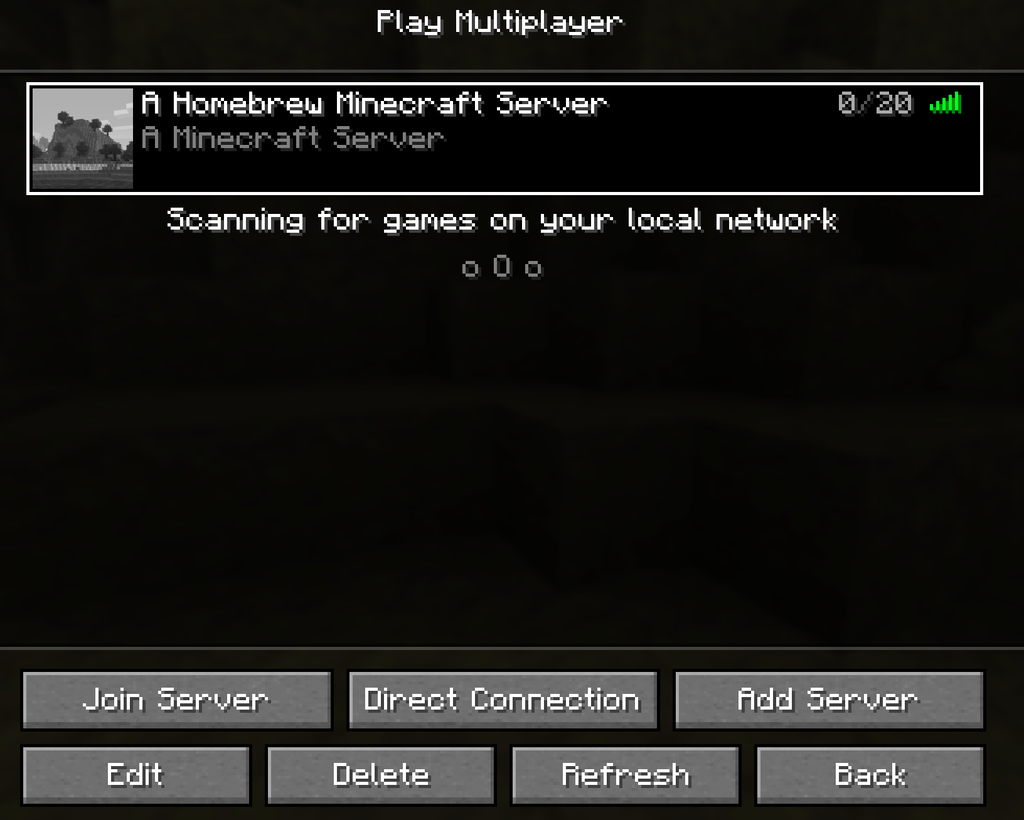
Once port forwarding is set up, test the connection yourself first. Open Minecraft, go to Multiplayer → Add Server, and enter your server’s IP address.
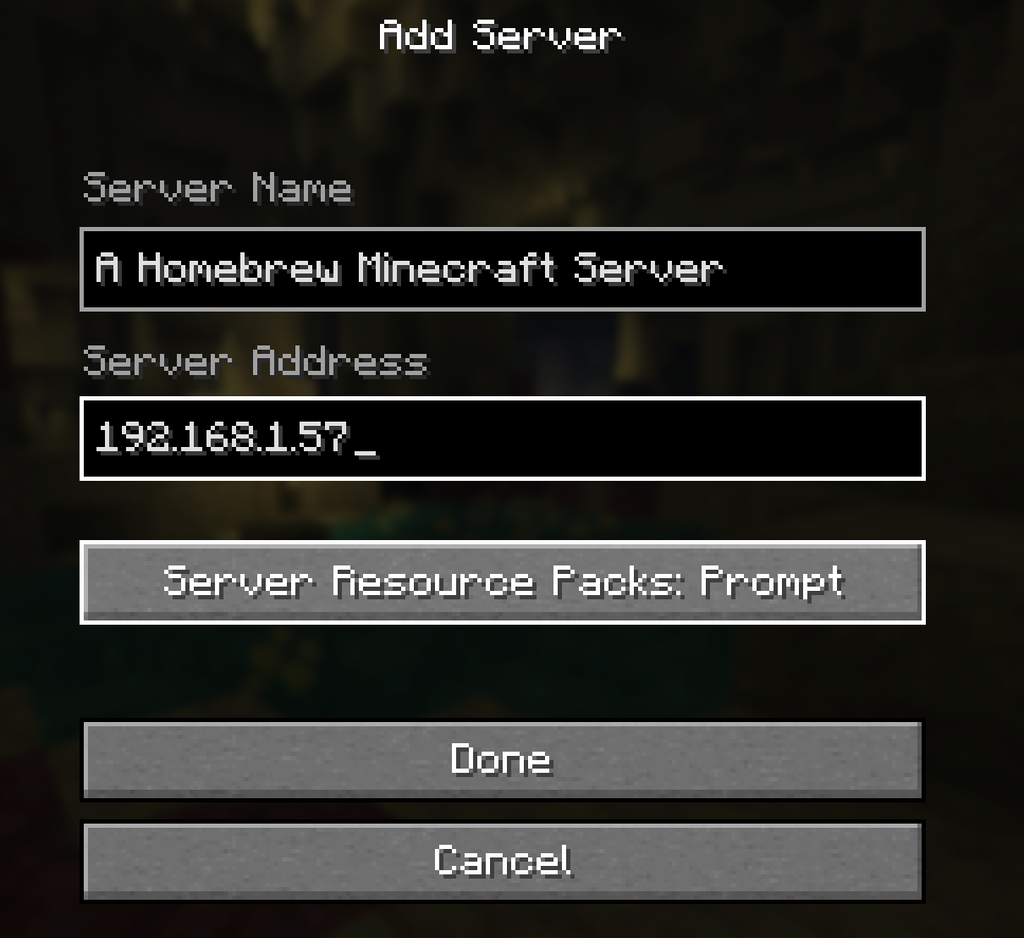
If everything’s configured correctly, your server will appear in the list with a green connection signal, confirming it’s reachable.
Step 5: Customize Your Server (Optional)
The Docker image supports environment variables for common settings. A few useful ones:
MEMORY=4G— allocate RAM (adjust based on your machine)DIFFICULTY=normal— set game difficultyMAX_PLAYERS=10— cap player countMODE=survival— game mode (survival, creative, adventure)
Add these as additional -e flags in your docker run command.
Since Docker containers can’t have their settings changed after they’re created, you’ll need to remove the existing container and run it again with your new flags added. First stop and remove the old one:
docker rm -f mc-serverThen re-run your docker run command from Step 2, adding the -e flags you want — for example:
docker run -d -it \
  -p 25565:25565 \
  -e EULA=TRUE \
  -e MEMORY=4G \
  -e DIFFICULTY=normal \
  -v /path/to/data:/data \
  --name mc-server \
  itzg/minecraft-server
Since your world data is stored in the mounted volume (not inside the container itself), recreating the container this way won’t delete your world — it’ll pick up right where it left off.
A simpler alternative for some settings: many of these values (like MAX_PLAYERS, DIFFICULTY, MOTD, and others) are also stored directly in the server’s server.properties file, located inside your mounted data folder (e.g., /path/to/data/server.properties). You can edit that file directly with a text editor and just restart the container — no need to remove and recreate it:
docker restart mc-serverThe environment variable method (-e flags) is mainly useful for initial setup or values you want locked in every time the container starts. For tweaking settings on an already-running server, editing server.properties directly and restarting is usually faster and doesn’t risk any container recreation mistakes.
Common First-Time Issues
- Server not showing up for friends: Almost always a port forwarding or firewall issue — double check the router config and any OS-level firewall blocking port 25565.
- Server crashing on low-RAM machines: Lower your
MEMORYsetting or reduceview-distancein the server properties. - World not saving between restarts: Make sure your
-vvolume path is correct and mapped consistently.
Why Docker Instead of Running Minecraft Directly?
Running the server in Docker keeps things clean and portable. If you ever move to new hardware, upgrade your OS, or want to run multiple game servers side-by-side (Minecraft, Valheim, ARK, etc.) without them interfering with each other, Docker handles the isolation for you. It’s the same approach that works well across most self-hosted game servers, not just Minecraft.
Next Steps
Once your server is stable, consider:
- Setting up automated world backups (a simple cron job copying your data folder works fine)
- Adding a watchdog to auto-restart the container if it crashes
- Exploring modded servers with Forge or Fabric support (the same Docker image supports both)
Running a home game server is a one-time setup with a big payoff — no subscription fees, full control over your world, and it’s a genuinely useful way to repurpose an old PC or a cheap mini PC.
Pingback: How to Play Minecraft, Valheim, and ARK with Friends: Every Method Compared – The Homelab Gamer
Pingback: Minecraft Realms vs Self-Hosting: Which Should You Choose? – The Homelab Gamer
Pingback: Best Paid Minecraft Server Hosting Services (Compared) – The Homelab Gamer
Pingback: How to Find and Join Public Minecraft Servers – The Homelab Gamer
Pingback: Best Mini PC for Hosting Game Servers in 2026 – The Homelab Gamer
Pingback: Docker vs Bare Metal for Game Servers: Which Should You Use? – The Homelab Gamer
Pingback: Best Minecraft Docker Images for Beginners (2026) – The Homelab Gamer
Pingback: Minecraft Docker Server Not Working? Common Fixes – The Homelab Gamer
Pingback: How to Use Minecraft’s Built-In LAN and Friends Multiplayer (No Server Needed) – The Homelab Gamer
Pingback: Port Forwarding for Game Servers: A No-BS Guide – The Homelab Gamer
Pingback: How to Keep Your Self-Hosted Game Server Running 24/7 – The Homelab Gamer
Pingback: Modded Minecraft Servers: Forge vs. Fabric (And How to Set Either Up) – The Homelab Gamer